Party hat makeover.

1


Plain old original party hats are great. Classic. But when it comes to the birthday party for my both my girls, I want more. I need more. Plus I am always up for a craft! I sat in my garage while one girlie slept and the other was away learning, just staring at the party hats.


 Hmmmm..... It looked like a little glitter, confetti, and feathers could fix the problem. They (glitter, confetti, and feathers) always do, don't they? I am a firm believer of that :)


All I did was Spray one side (the right to be specific) lightly with craft adhesive spray. It is the next best thing to gold spray paint if you ask me. Then I sprinkled the entire tacky area with paper confetti and glitter confetti so that one side had a little flair. Next I sprayed the spot I wanted to stick the feathers, put them on, and continued to make 20 more. Not to bad.


These party hats make me smile. And most importantly both of my girls lit up when they saw them. Exactly what I was hoping for :)

xoxo
d

Party on...

Pumpkin Oatmeal

4

Want a spooky and healthy start to your day? Add some pumpkin to your oats. It was so yummy, and the kids thought so too. Plus I could pass it off as a spooky October breakfast because it was orange! Total win in the "make your kids a healthy breakfast department" Somehow it doesn't look very orange in the photo...you get the idea though...

What you need:

1 serving of Your favorite cooked oats, we cooked ours stove top
1 heaping tablespoon Canned pumpkin, not the pie filling
1/8 teaspoon vanilla
2 tablespoons pure maple syrup, agave works here too (one mixed in and one over top)

The toppings:

A splash of cream
Candied pecans
Dried cranberries

I will now pat myself on the back and get on with the day :) . I hope yours is wonderful.

xoxo
d

Ice cream sundae cake.

5


In case you were wondering, I still know how to use a computer...I am indulging in some serious summer slacking at this here little space. It seems that like clock work, I get behind, and busy, then more behind....well I caught up! And in light of my lack of time, I thought I would share with you an easy dessert idea. An ice cream "cake", no baking required. All you need are a spring form pan and a few store bought ingredients. Similar to the terrines I shared last fall, this is mostly about assembly. And totally summer worthy if I do say so myself..


Ingredients 

1 container ice cream, cookies and cream
Oreos, twisted in half
Sundae fudge
Cool whip
Maraschino cherries
Chocolate chunks or chips
1 banana, sliced for serving
Parchment paper
*The only thing missing here to make it an official sundae cake is a nut topping as we are a mostly nut-free home.


Directions

Set all your ingredients out at room temperature for 10-15 minutes, or until softened. This will make the assembly super easy. Line your pan with a circular cut out of parchment to fit. Then add Oreos that have been twisted in half, smooth over half a carton of your ice cream, then cool whip, fudge, chocolate chinks and repeat ending again on chocolate chunks. Cover the pan with plastic wrap and refrigerate freeze for at least 3 hours. Run a knife around the sides of the cake and take out of the spring form pan. Finish with cherries and serve with sliced bananas.


If you want to make a healthier version if this I would suggest layering frozen yogurt with some berries and a topped with a sauce like this one.  Or layer up your version and be sure to let me know how it turns out!


Ps. I hope you are partaking in some slacking, and ice cream as well...

xoxo
d

Petit artist.

6

A few weeks ago, little E's school hosted their annual art show. This was our second year, and we were just as blown away as the year before. The school puts on a big event with help from the parents and auctions off pieces from each room. Each room studies a different artist for weeks and creates their own versions. Last year she studied Andy Warhol, which was amazing to have a 3 year old walking around talking about the Marilyn Monroe painting. We loved it.


This year they had John James Audubon. He painted wildlife, primarily birds.


The children's work was amazing and E was so proud to show off all that she had worked on. Every day leading to the event she would give us bits and pieces of what she was learning.


I signed up to bring a snack for the kids, and these were a hit. Strawberry and marshmallow pops. I am a firm believer that all food on a stick is better.


This was the piece that the children in her class worked on together. E said she helped paint a part of each piece of the owl, as did  ever other student. Talk about a collaboration! I have always loved art and it is important that I help my children find the same love. I like to think we enable an artistic and creative environment for the girls. Have any ideas?

xoxo
d

What's in my cookie jar: smores granola

4


Instead of bore you of why I have been on a blogging break (dislike), I thought I would share what I just ate a handful of out of my cookie jar, Smores granola. I really enjoy making my own pantry staples like granola, granola bars and honey bread. I just took my tried and true granola recipe and changed it up on a whim. You must try this. Delish over some ice cream or yogurt. Make it now.....

Smores Granola
     makes about 4 cups

3 cups rolled oats (not the quick cook)
1/2 cup sunflower seeds
1/4 cup wheat germ
1/4 cup unsalted butter
1/3  cup honey
1/2 teaspoon kosher salt
1 tablespoon cocoa powder
1 cup mini marshmallows
1/2 cup Gram crackers, broken into pieces
1/3 cup mini chocolate chips

Preheat oven to 300 degrees. On a baking sheet, combine oats, wheat germ, and sunflower seeds. Bake while you melt butter and honey in the microwave or small saucepan over low heat. Once melted stir in salt and cocoa powder. Pour over toasted oat mixture and mix well. Bake for 25 minutes, stirring half way. Let cool almost completely, mix in marshmallows, Gram crackers, and mini chocolate chips. The chocolate chips will melt a bit and this will create delicious clusters! Store at room temperature for as long as it lasts in your cookie jar :)........

On a completely contradictory subject I have been giving quite a bit of effort into shaping up before summer. I have been gyming it 4-6 times a week, taking the most wonderful class The daily method, and now I am joining some wonderful blogging peeps for a 30 day shred. With the help of Jillian. Today is day 3 and I am sore in a good way! Thanks to Torrie and Danielle for getting me motivated :). You can follow the "shredcrew" on twitter here.

And yes I know somres granola is not on the diet plan! Now to go catch up on all my favorite blogs while I have been unplugged.....

xoxoxo
d

Back from nowhere and a "cheater" cake pop.

4
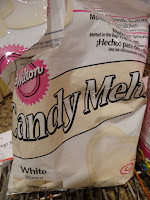
So life gets busy huh? After the holidays my attention was quickly diverted to something most important. The shared birthday of my two sweet girls. They are now one and four. Tear. I had planned so much to make for their rainbow-candy themed party, and a cake pop was one of them. I quickly ran out of time and thought of a cheater cake pop, or "semi-homemade". They turned out fantastic and tasty too. And the best part was that it took all of 15 minutes.It is too good not to share and SO EASY. Ready?

 +
+
=

 Directions: Melt the candy melts in the microwave according to the package directions. While this is happening, unwrap the cakesters and put on a candy stick. Dip in the melted candy. Next sprinkle or dip in desired topping. This is were you can change them around. Want to make Valentine's day cake pops? Sprinkle them with tiny heart sprinkles. Wrap them in treat bags, tie with pink and red ribbons, and give them to your favorite little sweetie.


xoxo,
d

And if you have been wondering what we have been up to, here is a quick peek:


Celebrating.
 

laughing.


tasting cake.

birthday fun.


little Rapunzel meets big Rapunzel.

Monday. Better late than never...

6


So the weekend was great. And I have to start out by screaming: "I MET INA GARTEN". Here I go again...blah blah blah...Ina Garten....blah blah. But seriously, it was so great! I talked about the book signing a while back. Well thanks to my mom and two sweet little girlies....we headed up to South Coast Plaza Mall (my all time fav), had lunch at Lawry's (yum) and met Ina. Ya we go way back now. Way back to last Friday. I do have to say that I met some lovely ladies who let me sneak back in line with them. And if it wouldn't have been without their kindness, I never would have gotten in, thank you! It was a completely mixed group of "Ina lovers", young, old, people trying to look like her (you know the black or navy standard button up) sporting Ina style and a ladylike bob. When I finally made it up to her, I was so excited and nervous:
me: "Thank you so much for the beautiful recipes and inspiration, YOU really are the one who has taught me how to cook and love "good" food"

Ina: "Well thank you for coming to the signing and expressing such kind words"

me: nervous and excited..."uh...gee Ina your hand must be getting sore"

Ina: Laughing a bit.."well that's like saying there is still not a line of lovely people in line....I hope you enjoy the new book""

me: "Oh I ALREADY have!!"
{me just nervously chatting away + one sweet PATIENT niece}
Ugh...am I completely lame or what?! "Gee Ina your hand must be sore"? It was like meeting a cooking rock star, and she seemed so kind and sweet to top it off! Love her! Now if I can just figure out how to hang out in her kitchen with her (In a non stalker way!). Something like how Gwyneth did and make homemade ricotta for brunch (which is SUPER easy by the way). Thanks to Pretty Mommy for that link!


Enough Ina gushing, and let's celebrate by having a piece of her  Old Fashioned Banana cake from her new book:  How Easy Is That?: Fabulous Recipes & Easy Tips.


Old-Fashioned Banana Cake
  • 3 very ripe bananas, mashed
  • 3/4 cup granulated sugar
  • 1/2 cup light brown sugar, lightly packed
  • 1/2 cup vegetable oil
  • 2 extra-large eggs, at room temperature
  • 1/2 cup sour cream
  • 1 teaspoon vanilla extract
  • Grated zest of 1 orange
  • 2 cups all-purpose flour
  • 1 teaspoon baking soda
  • 1/2 teaspoon kosher salt
  • 1/2 cup coarsely chopped walnuts
  • Cream cheese frosting (recipe follows)
  • Walnut halves, for decorating

PREHEAT oven to 350 degrees. Grease and flour a 9 x 2-inch round cake pan. MIX bananas, granulated sugar and brown sugar in bowl with an electric mixer on low speed until combined. Add oil, eggs, sour cream. vanilla and orange zest. Mix until smooth. STIR together flour, baking soda and salt in a separate bowl. With mixer on low, add dry ingredients and mix just until combined. Stir in chopped walnuts. Pour batter into the prepared pan and bake for 45 to 50 minutes, until a toothpick inserted in the center comes out clean. Cool in pan for 15 minutes, turn out onto cooling rack and cool completely. SPREAD frosting thickly on top of cake and decorate with walnut halves. Slice and serve

Cream Cheese Frosting
  • 6 ounces cream cheese, at room temperature
  • 6 tablespoons unsalted butter, at room temperature
  • 1 teaspoon pure vanilla extract
  • 2 1/2 cups sifted confectioners' sugar (1/2 pound)
MIX cream cheese, butter and vanilla in the bowl of an electric mixer fitted with paddle attachment on low speed until just combined. Don't whip. Add sugar and mix until smooth. Enjoy with friends! This would make a great layered cake for a children's birthday party, just double the recipe!
 
Hope you all had a great weekend too!!
 
xoxoxo
d
 
***we will go with meal planning Monday on TUESDAY this week :)***
 

What's in my cookie jar.

5


This is one of those recipes that you come across and wonder: "now why didn't I think of that?". One of my lovely Aunts was nice enough to send me this recipe for Grahm Crackers. This was fun to make with e, she loves scooping out the flour! There is another grahm cracker recipe in the Retro Desserts book that had the Oreo recipe. I will have to try it to compare to this one and let you know which is better! I these this would make a sweet little holiday gift with a couple of homemade marshmallows (which a delicious by the way) and a hunk of chocolate in a cute little bag. Enough with the idea overload and on with the recipe....

Ingredients

  • 1C butter, softened
  • 1/2C dark brown sugar, packed
  • 2T honey
  • 2 tsp vanilla extract
  • 1 1/2C flour
  • 1C whole wheat pastry flour
  • 2 tsp cinnamon, divided
  • 3/4 tsp baking soda
  • 1/2 tsp salt
  • 3T sugar

 Beat butter and next 3 ingredients at medium speed with an electric mixer for one minute, or until fluffy.


Combine flours, 1 1/2 teaspoons cinnamon, baking soda and salt in a large bowl; add to butter mixture, beating until just blended.


Use dampened fingertips to press dough into a 17"x20" jelly roll pan lined with parchment paper 


smooth surface of dough with bottom of a dry measuring cup.Make sure to flatten them out really well here, mine were a little bit too think. Remove and discard top parchment paper.


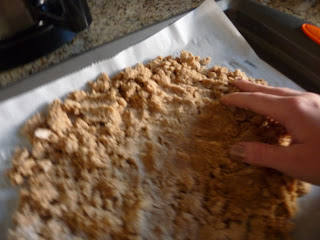
Sprinkle with remaining 1/2 teaspoon cinnamon and sugar over dough. I sprinkled a little extra. Using a fork, score dough into 24 squares, pressing completely through dough with each indentation. Bake 350 degrees for 20 minutes, or until golden and crisp. While crackers are still warm, score again. Cool completely and break into individual crackers. Makes 24.

Enjoy!

xoxoxo
d


Whats in my cookie jar?

3

Like I have said before, cookie jars aren't just for cookies, that is the case again this week :). Last week I took a class with a local chef, Pamela Schwartz, on cheese making (more info on cheese making coming soon!) and she gave me a recipe for a  healthy gluten free "muffin". It looks more like a scone with a muffin texture, and is so fragrant because of the oranges in it. It is a great snack for the little ones before school or in a lunch box.


Cranberry orange "muffins"
(makes 12 large or 48 mini) 
  • 1.5 cups almond meal
  • 1 cup flax meal
  • 1/4 teaspoon salt
  • 3/4 teaspoons baking soda
  • 2 egg whites
  • 1/2 cup agave
  • 1.5 cups dried cranberries
  • 2 oranges (slice and process in food processor, peel and all!)
  • 3/4 cups pecans (optional)

Directions
Mix the dry ingredients, mix the wet ingredients and combine.I sliced the oranges and processed them in my food processor prior to adding them to the wet ingredients. Bake at 400 degrees for 12 minutes for mini muffins and 18-20 for large. They are great served with a bit of cream cheese whipped with a few tablespoons agave or honey. Or to make an agave glaze to drizzle over, combine 2 tablespoons agave with 1/4 cup confectioners sugar until smooth. drizzle over and enjoy a healthy treat!

We have a pumkin roasting in the oven, so check back for a yummy pumkin recipe!
Related Posts with Thumbnails

domestic dish. Designed by Liven Design